

If you’ve ever wished you could run Windows on Mac, the good news is, you can. Whether it’s for gaming, productivity software, or apps that don’t support macOS, installing Windows gives your Mac the versatility of both worlds. Thanks to Apple’s built-in Boot Camp Assistant, the process is easier than most people think.
In this detailed guide, you’ll learn exactly how to install Windows 10 on an Intel-based Mac safely and efficiently. Follow along, and within an hour, you’ll have a dual-boot system ready to go.

Why You Should Run Windows on Mac
Running Windows on Mac allows you to enjoy the full flexibility of both operating systems. From Microsoft Office features that work better on Windows to gaming titles not supported on macOS, the benefits are endless.
Many professionals use this method to run engineering, design, or finance software like AutoCAD, SolidWorks, or QuickBooks Desktop, applications that either perform better or are exclusive to Windows.
What You’ll Need Before You Run Windows on Mac
Before you dive into the setup process, make sure your Mac meets the basic requirements to run Windows on Mac without issues:
-
An Intel-based Mac computer (Apple Silicon M1 or M2 chips are not supported by Boot Camp).
-
At least 64GB of free disk space on your startup drive (128GB recommended for better performance).
-
A stable power source if you’re using a MacBook.
-
A Windows 10 ISO file, which you can download directly from Microsoft’s official website.
✅ Pro Tip: Back up your Mac using Time Machine before you start the installation to avoid losing any data in case of partition errors.
Step 1: Download the Windows 10 ISO File
To run Windows on Mac, you first need a Windows 10 ISO file. This file acts as the installer for the Windows operating system.
Here’s how to get it:
-
Under Select Edition, choose Windows 10 (multi-edition ISO).
-
Click Confirm, then choose your language.
-
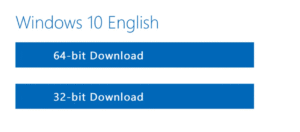
Select 64-bit Download to start downloading.
Depending on your internet speed, the download may take between 20–30 minutes since the file size is around 6GB.
Step 2: Launch Boot Camp Assistant
The easiest way to install and run Windows on Mac is through Boot Camp Assistant, Apple’s built-in utility that guides you through the process.
Steps to follow:
-
Open Boot Camp Assistant (you’ll find it in Applications → Utilities).
-
Click Continue to start.
-
When prompted, select the Windows 10 ISO file you downloaded earlier.
-
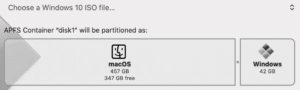
Choose how much storage space to allocate for Windows (minimum 42GB).
-
Click Install and let your Mac create the Windows partition.
This process takes around 10 minutes. Once it’s done, your computer will automatically restart to begin the Windows installation.
Step 3: Install Windows on Your Mac
After your Mac restarts, you’ll see the blue Windows logo on your screen instead of the Apple logo. This means the installation is starting.
Follow the on-screen instructions:
-
Select your language and region.
-
Enter your Windows product key, or skip it if you don’t have one.
-
Choose the Boot Camp partition when prompted for an installation drive.
Windows will begin copying files, installing updates, and configuring settings, this step usually takes about 10 minutes.
Step 4: Set Up Windows on Mac
Once installation completes, your Mac will restart and boot into Windows. Now it’s time to set up your system:
-
Choose your keyboard layout and connect to Wi-Fi.
-
Sign in with your Microsoft account or create a new one.
-
Set a PIN or password to secure your new Windows account.
You can use Cortana (Windows’ virtual assistant) to guide you through the setup, or simply use your keyboard and mouse to proceed manually.
Step 5: Install Boot Camp Drivers on Windows
After the initial setup, your Mac will prompt you to install Boot Camp drivers. These drivers help ensure your trackpad, keyboard, speakers, and camera work properly under Windows.
Steps:
-
When the Boot Camp installer appears, click Next and follow the prompts.
-
Wait for the drivers to install, it usually takes around 10 minutes.
-
Restart your Mac when prompted.
Once complete, your Windows system should now run smoothly on your Mac hardware.
Step 6: Use Windows on Mac
You’re now free to use Windows as you would on a regular PC. You can browse the internet using Microsoft Edge, download Google Chrome, or even install games and apps from the Microsoft Store.
Want to play games like Valorant or use software like AutoCAD? You can do it easily. Just remember that performance might vary compared to a native Windows laptop because of hardware limitations.
Step 7: Switch Between Windows and macOS
The best part about using Boot Camp is that you can easily switch between Windows and macOS whenever you want.
Here’s how:
-
Restart your Mac.
-
As soon as the screen goes black, press and hold the Option (⌥) key for 5 seconds.
-
You’ll see two startup disks, Macintosh HD (macOS) and BOOTCAMP (Windows).
-
Choose your desired operating system.
This flexibility is what makes it so worthwhile to run Windows on Mac, you truly get the best of both worlds.
Why Boot Camp Is Still the Best Option
Although tools like Parallels Desktop and VMware Fusion offer virtualized Windows environments, Boot Camp remains the best option for running Windows natively. It gives you:
-
Full hardware performance for gaming and design software.
-
Direct access to your Mac’s GPU for smoother graphics.
-
Complete system compatibility without the lag of virtualization.