

If your Android screen feels too crowded or too empty, you’re not alone. Many users want to change display density Android to make icons smaller, fit more on the screen, or simply improve readability. Luckily, Android offers a simple way to adjust display settings and tailor your screen layout exactly how you like it.
This guide will walk you through everything, from what display density means to the exact steps for customizing it on any Android device. Whether you want a minimal look or a data-packed interface, this tutorial will help you make the change smoothly and safely.
What Does Display Density Mean on Android?
Before we jump into how to change display density Android, let’s understand what display density actually is. In simple terms, display density controls how many pixels are shown per inch on your screen. It determines how large or small everything appears, from app icons to text and menus.
Think of display density as your phone’s zoom level. Increasing density makes items smaller and fits more on-screen, while lowering density makes icons and text larger and easier to read. This flexibility is especially handy for users with different screen sizes and resolutions across various Android models.
For example, Samsung, Google Pixel, and Xiaomi devices all have unique screen resolutions, meaning display density settings can drastically improve your visual experience on each.
Why You Should Change Display Density on Android
There are several reasons you might want to change display density Android:
-
Personalization: Adjust icons and font size to match your visual comfort.
-
Better multitasking: Fit more apps or content on one screen without scrolling.
-
Accessibility: Make text and buttons larger for easier readability.
-
Optimization: Customize how your favorite apps and widgets appear.
In short, this setting gives you control over how your Android device feels and functions.
How to Change Display Density on Android: Step-by-Step Guide
Now let’s walk through the practical steps to modify your Android’s display density. Follow these six simple steps carefully.
Step 1: Open Your Phone’s Settings
Start by opening the Settings app on your Android device. You can find it on your home screen or in the app drawer.
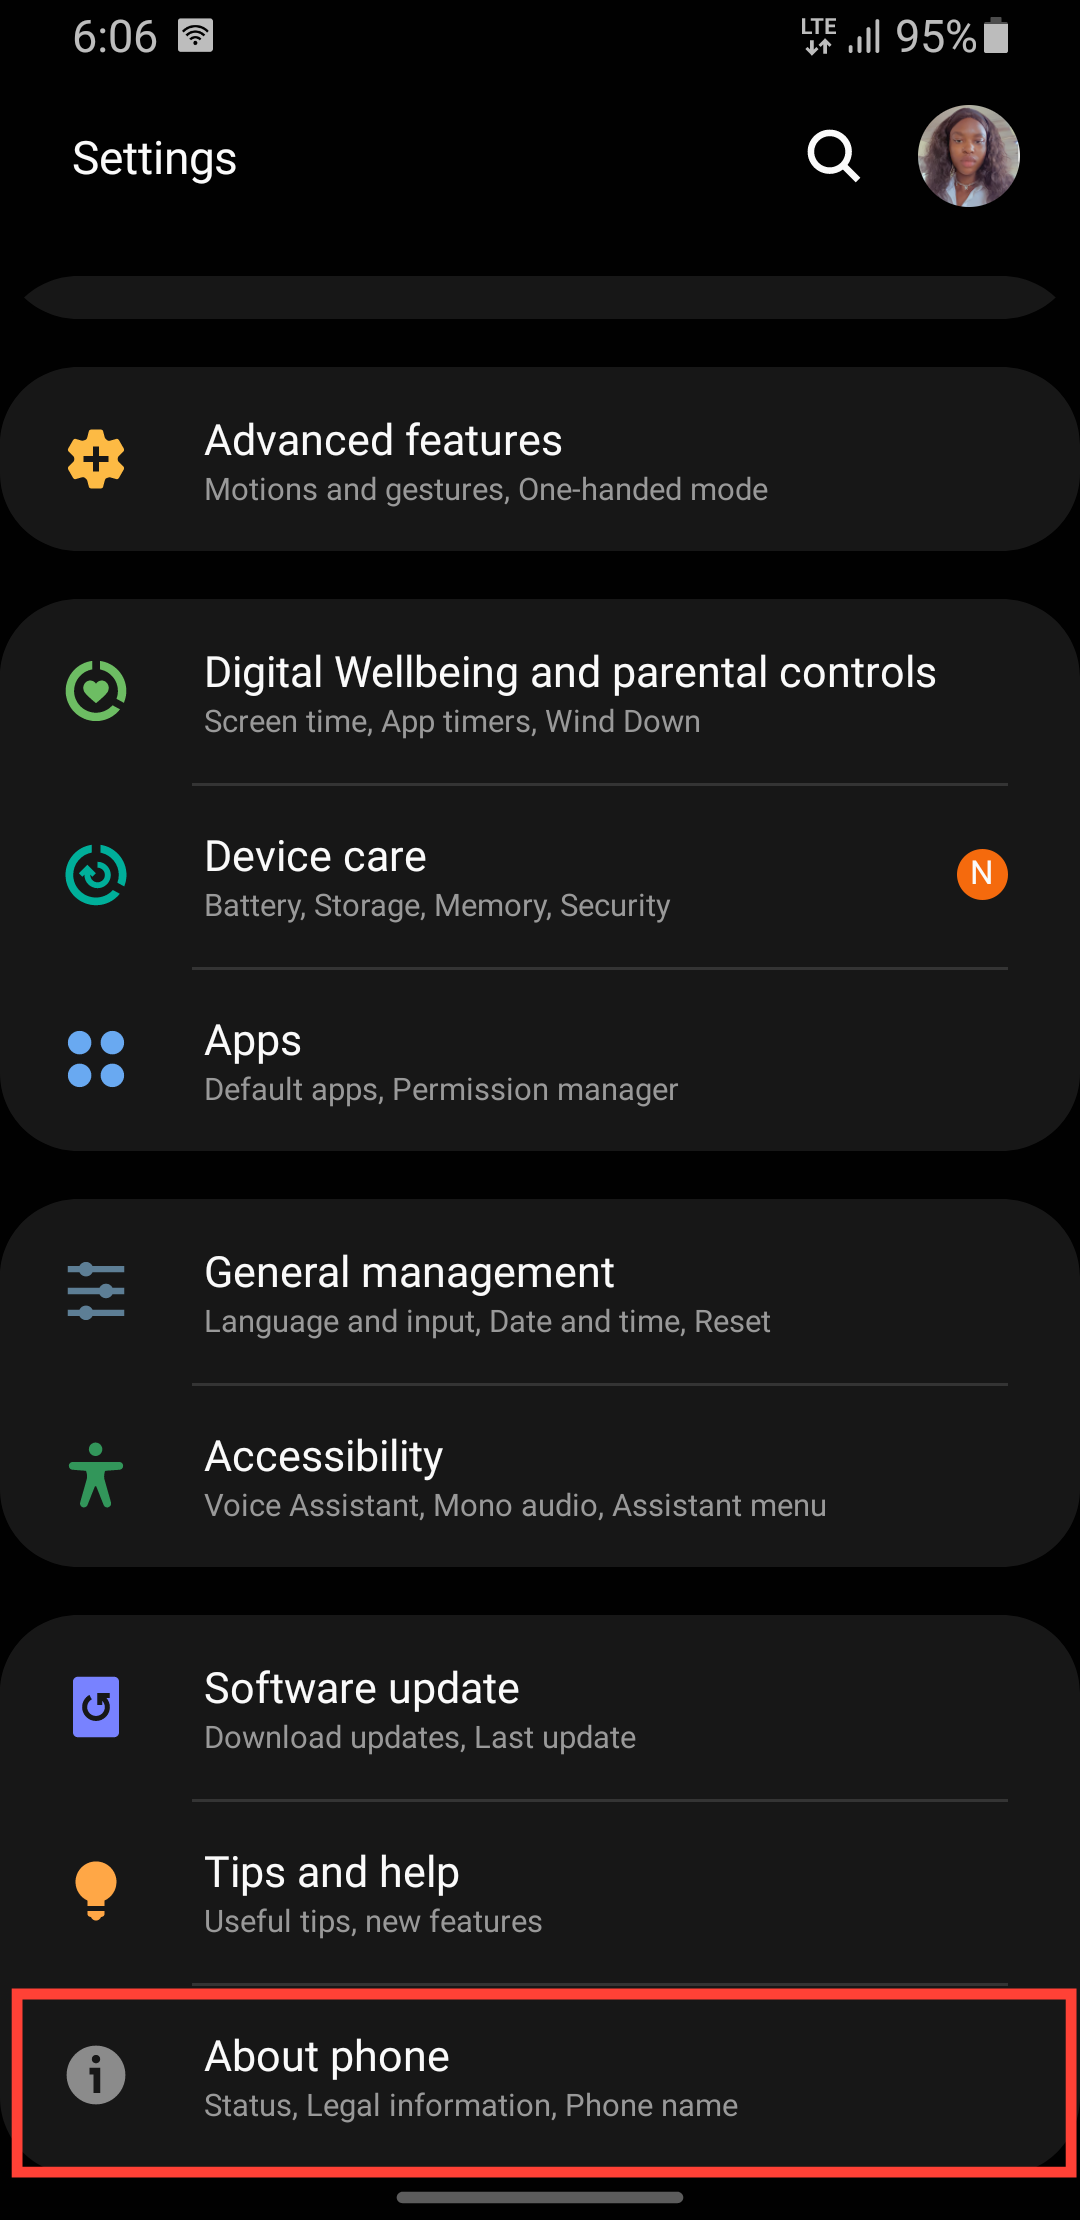
Step 2: Select “About Phone”
Scroll down and tap on About phone. This section contains key information about your Android software and device configuration.
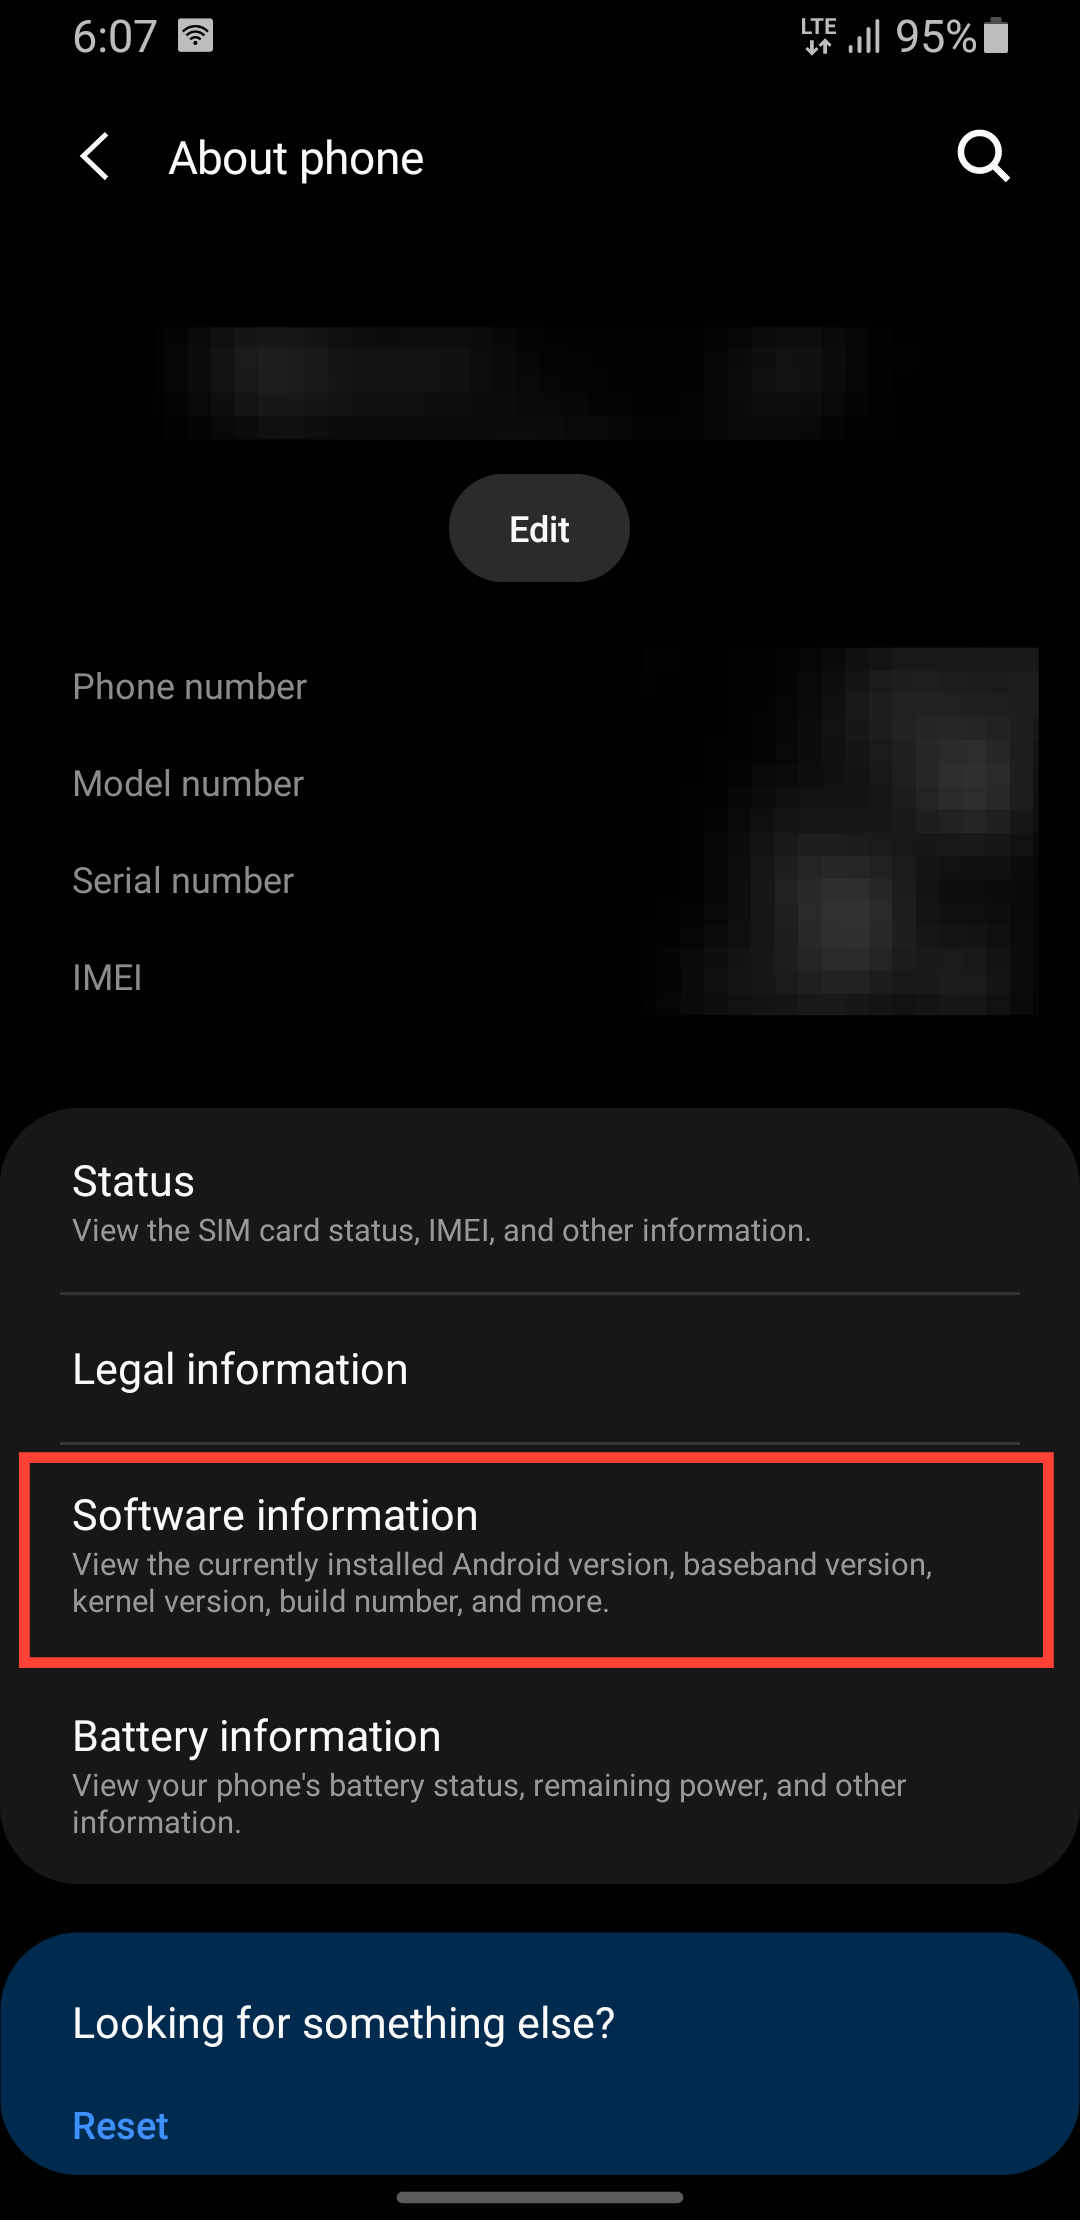
Step 3: Tap “Software Information”
In the “About phone” section, locate and tap Software information. This reveals advanced details about your Android version.
Step 4: Enable Developer Mode
Find the Build number option and tap it seven to ten times quickly. You’ll see a message that says “Developer mode has been enabled.”
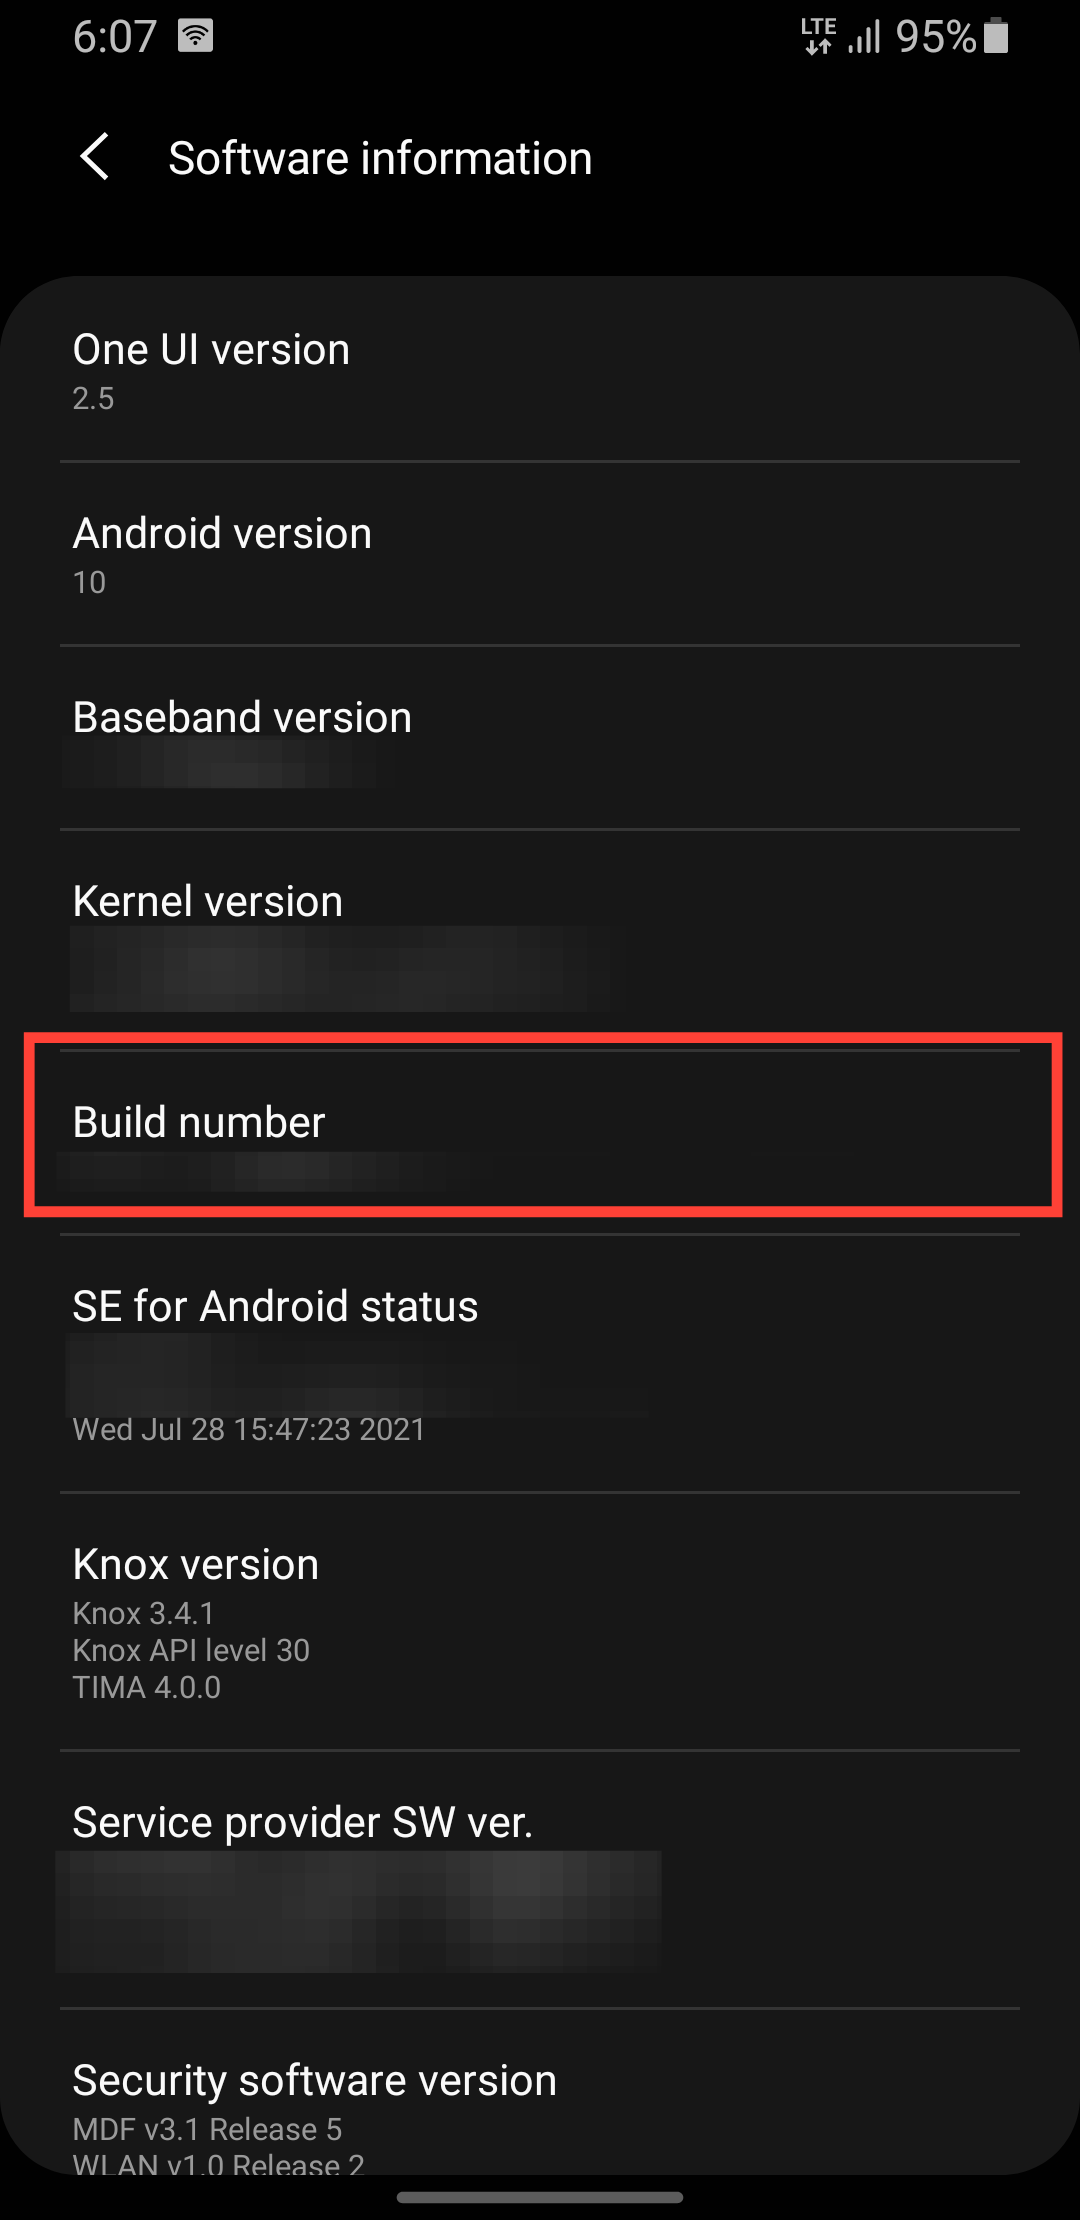
This unlocks the advanced settings menu you’ll need next.
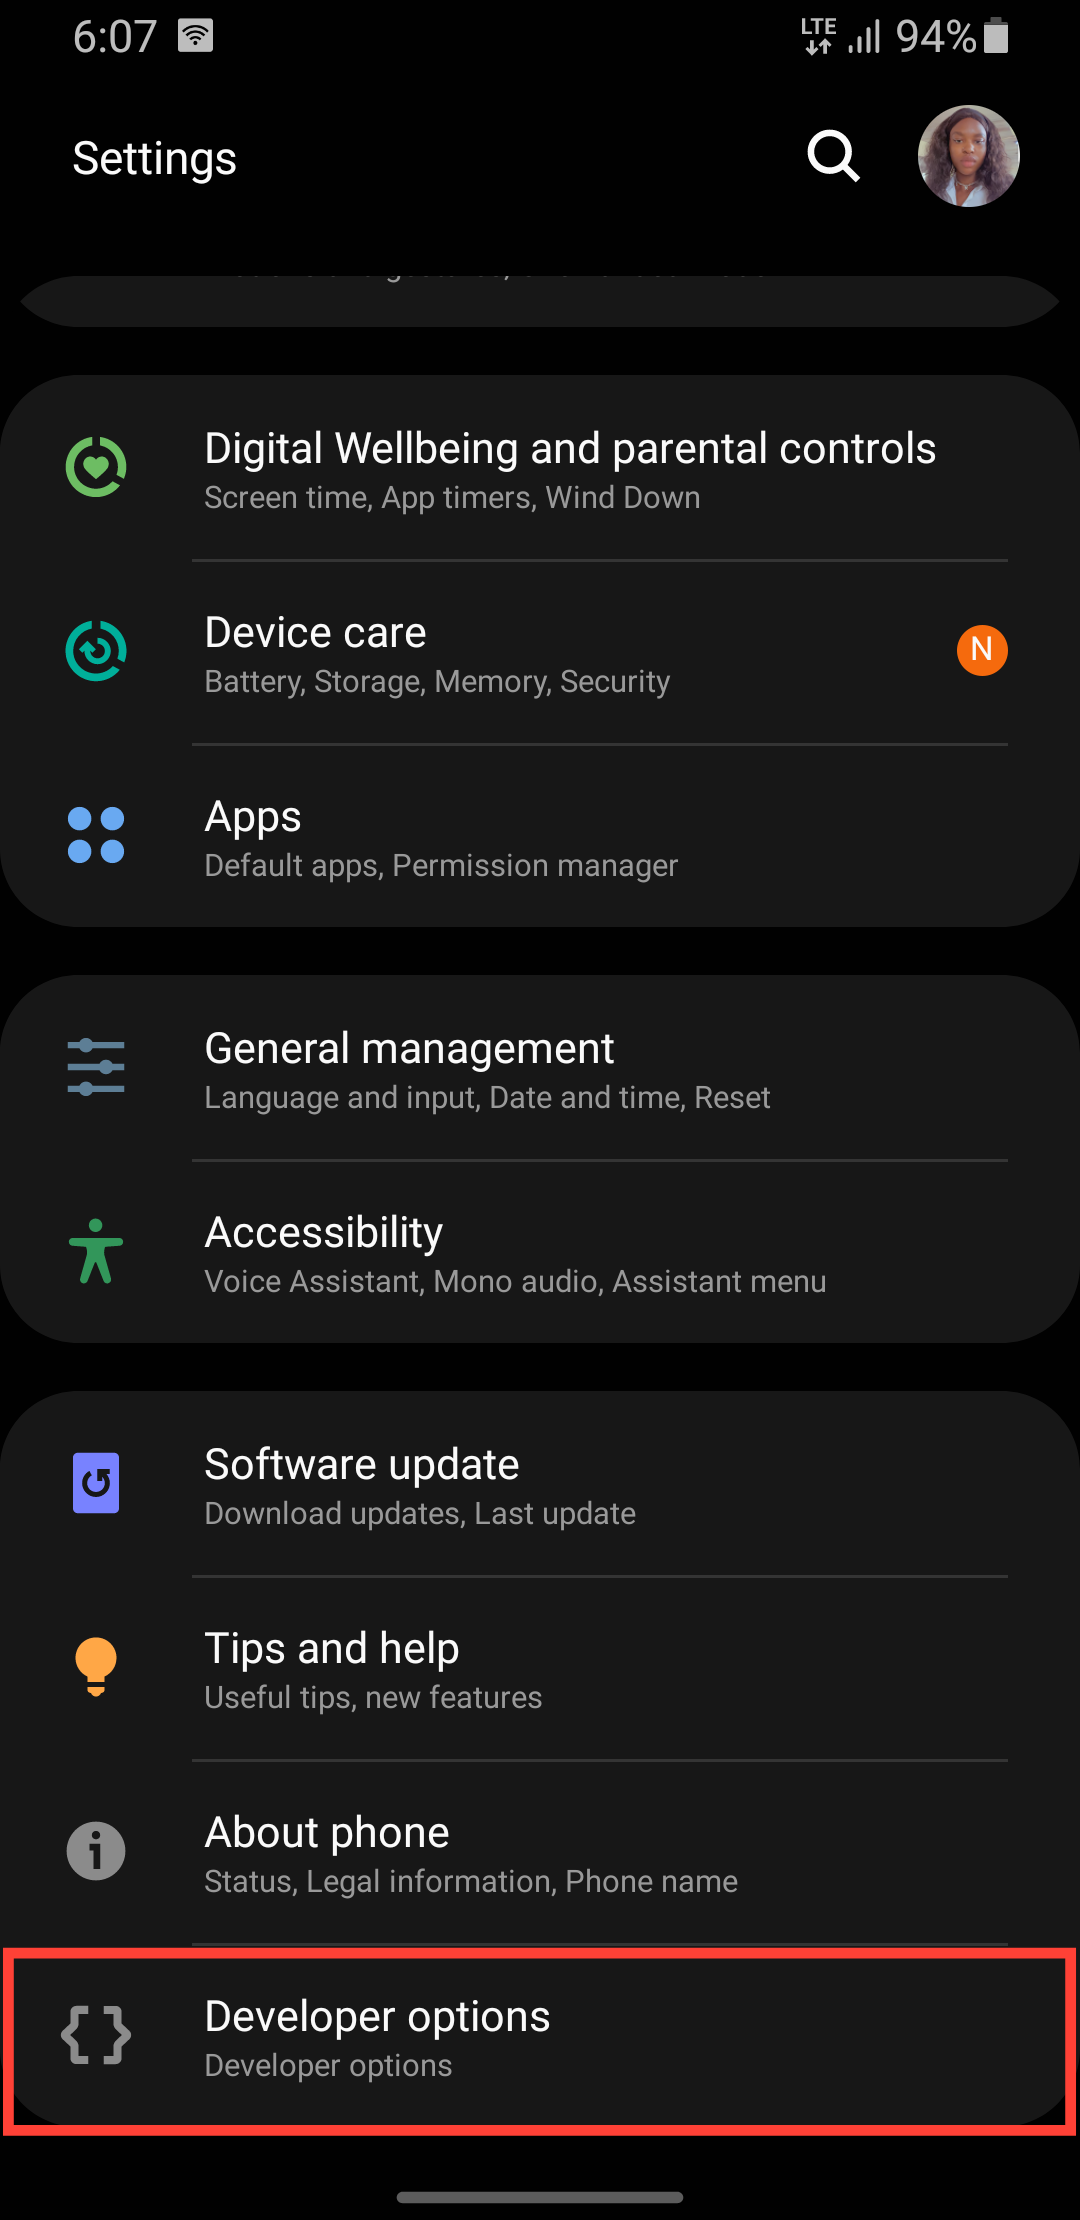
Step 5: Open Developer Options
Return to the main Settings menu, scroll down, and tap Developer options. This section contains powerful customization tools meant for developers, but safe to use for display adjustments.
Step 6: Adjust the “Minimum Width” Value
Scroll down until you find Minimum width (this controls display density).
Now tweak the value:
-
Higher number = smaller icons and text (more content fits on screen).
-
Lower number = larger icons and text (easier to read).
Experiment gently, increase or decrease in small increments (like 10–20) to find your perfect balance.
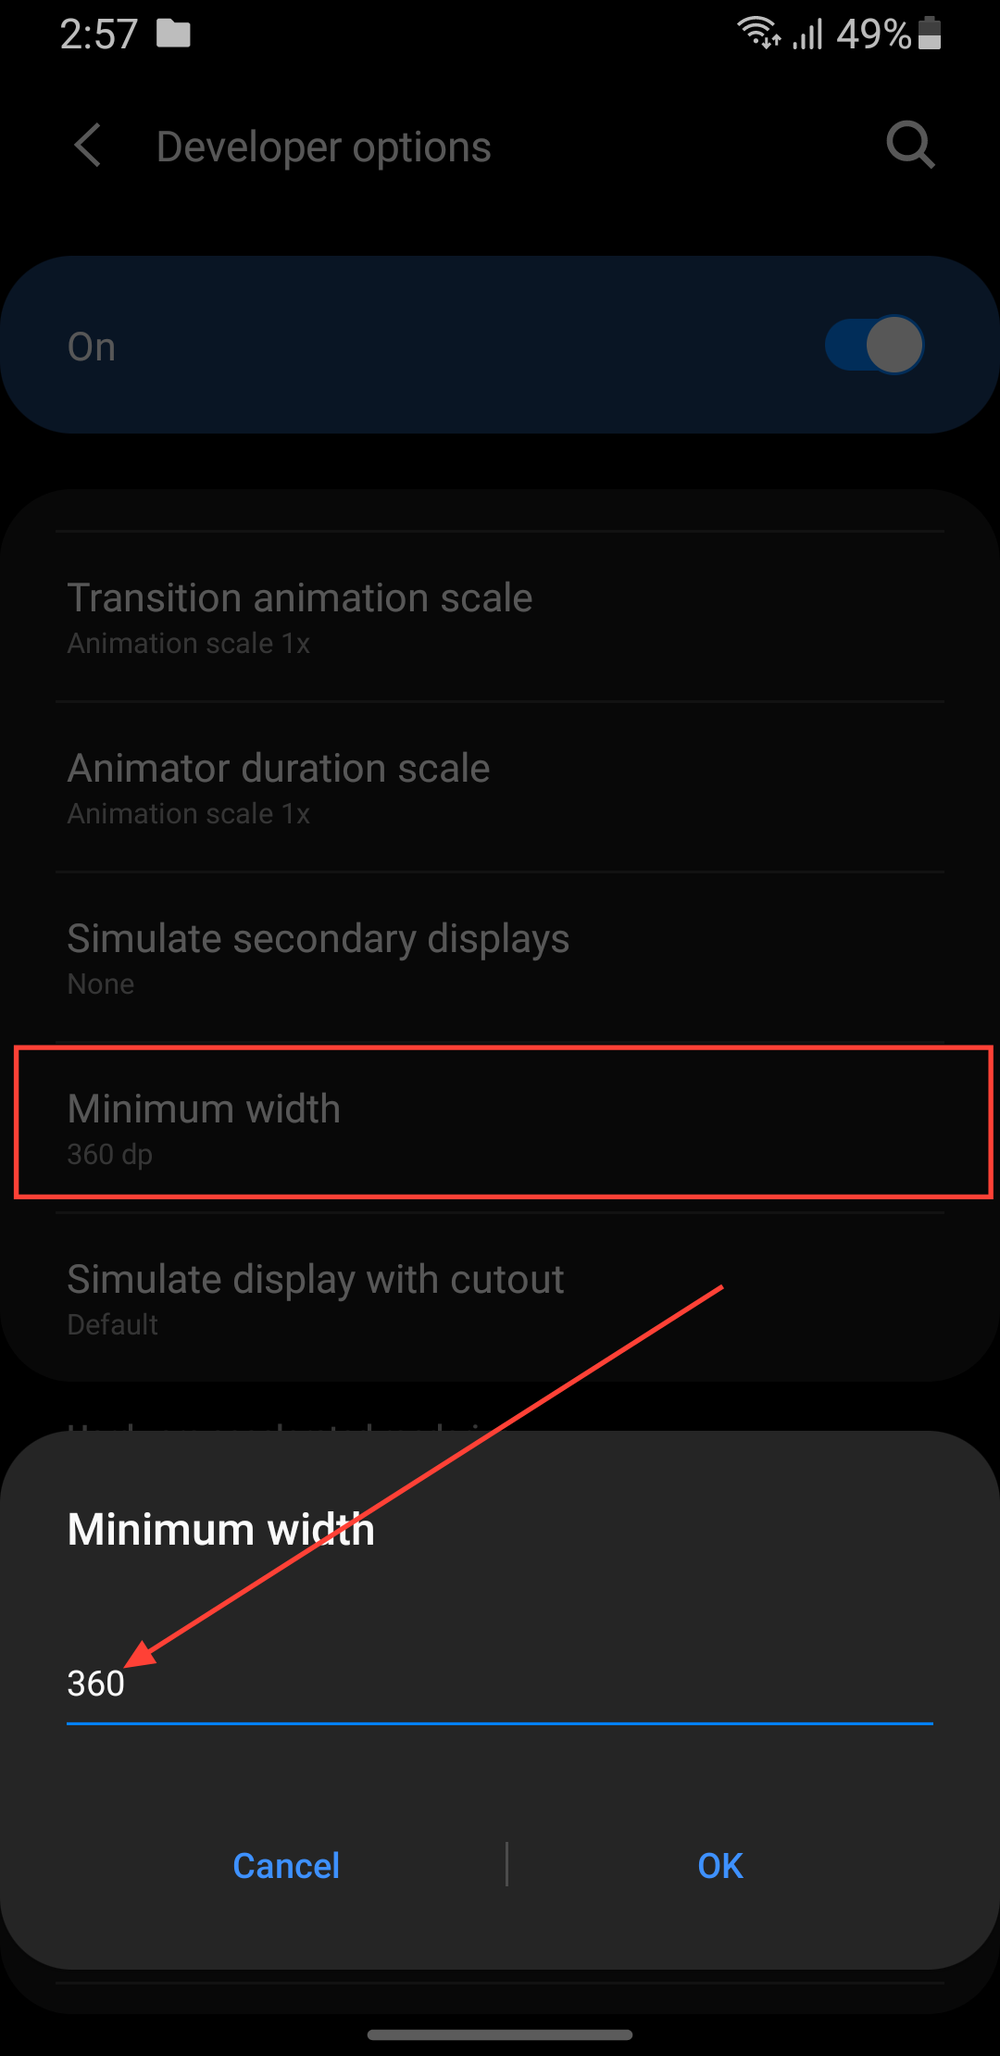
Tip: Most phones work well between 360–480 dpi, but this varies by screen size and model.
How Display Density Changes Affect Your Device
When you change display density Android, you’re essentially changing how your system interprets its pixel grid. This affects everything from your app drawer layout to how websites display in browsers.
Here’s what you can expect:
-
A denser display fits more apps per page.
-
Larger density makes UI elements more compact.
-
Some apps may slightly resize or shift layouts (but this is normal).
Don’t worry, if you’re unhappy with the change, simply return to the default DPI value or reset the developer settings anytime.
Alternative Ways to Adjust Display Density
While the Developer Options method works universally, some Android manufacturers (like Samsung and Xiaomi) include built-in settings for display scaling.
Method 1: Use Display Zoom (Samsung & Pixel)
-
Open Settings → Display → Screen zoom.
-
Slide the bar to adjust icon and text size instantly.
Method 2: Use Accessibility Settings
-
Go to Settings → Accessibility → Display size and text.
-
Change display size to small, default, or large.
These alternatives are simpler for users who prefer not to enable developer mode.
Common Questions About Display Density
Does changing display density harm my phone?
No, it’s completely safe when done properly. You’re only adjusting how Android scales content visually.
Can all phones change display density?
Most modern Android devices (Android 8.0 and above) support it, though options may differ slightly by brand.
What if I want to revert changes?
Just go back to Developer options → Minimum width and reset to the original value (usually displayed automatically).
Final Thoughts
Changing display density on Android gives you full control over how your device looks and feels. Whether you want to see more content at once or make text easier to read, this feature lets you customize your phone exactly to your liking.
So go ahead, explore your settings, experiment with values, and discover the visual layout that feels perfect for you. Once you master this tweak, your Android will truly feel like your phone again.