
Auto Transcribe Meetings: A Complete Guide to Hands-Free Note-Taking in Microsoft Teams
Auto Transcribe Meetings is one of the most underrated features inside Microsoft Teams, yet it can completely transform the way your team captures information. Instead of scrambling for notes or missing important details, this feature automatically records and converts spoken discussions into text, complete with timestamps and speaker labels.
In today’s fast-paced work culture, having accurate meeting records is essential for decision-making, accountability, and productivity. That’s where the Auto Transcribe Meetings feature becomes a true lifesaver. In this in-depth guide, you’ll learn how to enable transcription, download your transcript, and use it to improve your workflow.
For users who regularly rely on tools like Microsoft Teams, Teams Recap, and Microsoft 365, understanding how to Auto Transcribe Meetings can dramatically simplify your day-to-day operations.

Why Auto Transcribe Meetings Is a Game-Changer
Manual note-taking often leads to missed points, incomplete action items, or distractions during calls. With Auto Transcribe Meetings enabled, you get:
-
A full written record of everything said
-
Clear speaker identification
-
Timestamps to revisit key moments
-
Hands-free productivity
-
Accurate summaries for absent teammates
This feature reduces friction, allows better collaboration, and makes follow-up tasks far easier to manage.
You can also explore official documentation from Microsoft to understand more about the technology behind their AI-driven transcription engine.
Auto Transcribe Meetings – How to Enable It in Microsoft Teams
Let’s walk through every step in the simplest way possible. You’ll only need a few clicks to get your transcription started.
Auto Transcribe Meetings – Start Your Microsoft Teams Call
To use Auto Transcribe Meetings, begin by starting or joining a Microsoft Teams call. Whether it’s a scheduled meeting or an impromptu session, transcription works across both scenarios.
Make sure you’re the organizer or have permission to manage recording and transcription settings.
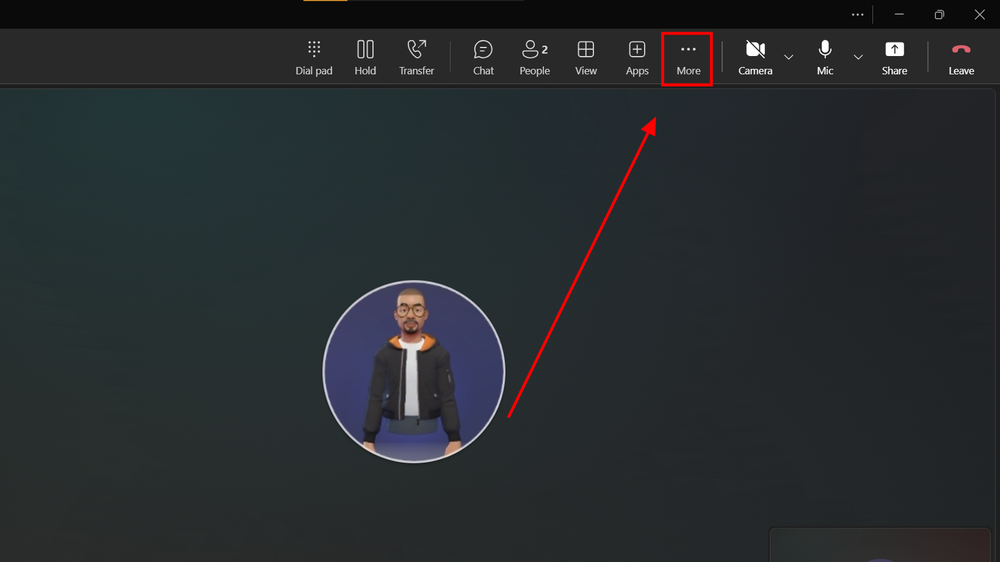
Auto Transcribe Meetings – Open the “More” Menu
Once inside the meeting, look at the toolbar located at the top or bottom of your screen (depending on your Teams version).
Click on More (three dots). This is where Teams stores most advanced meeting options, including recording, transcription, and breakout rooms.
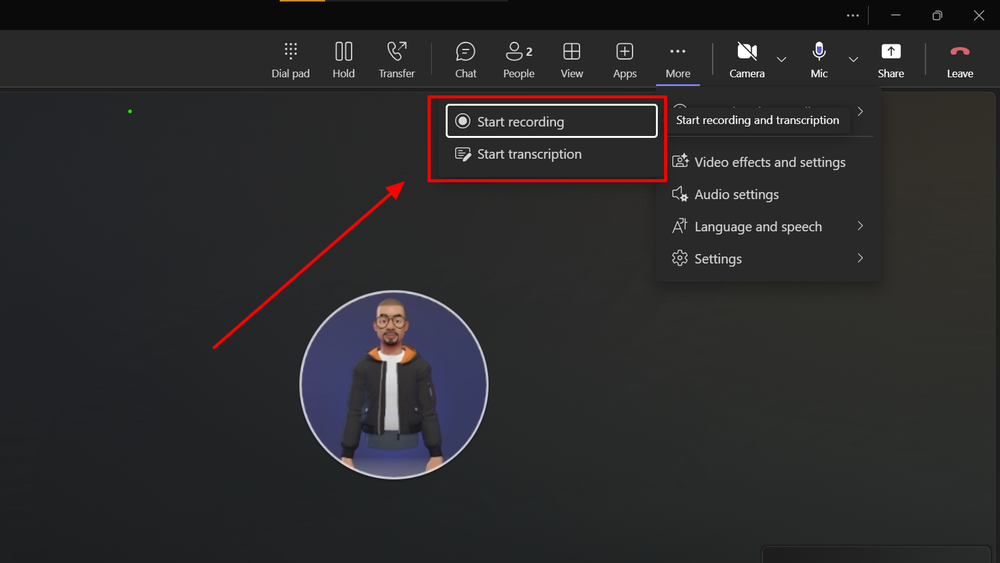
Auto Transcribe Meetings – Choose “Record and Transcribe”
From the expanded menu, select Record and transcribe.
This opens a quick submenu where you’ll find two main options:
-
Start recording
-
Start transcription
While both options save your discussion, they work slightly differently. Recording saves video + audio, while transcription provides written text. It’s your preference, either one enables transcript generation.

Auto Transcribe Meetings – Start Transcription
Click Start transcription to launch the Auto Transcribe Meetings feature.
Teams will immediately show a notice to all participants that transcription has been enabled. This ensures transparency and protects user privacy, especially in regulated industries.
You’ll be prompted to confirm the spoken language of the meeting. Once confirmed, Teams begins real-time transcription on its servers.
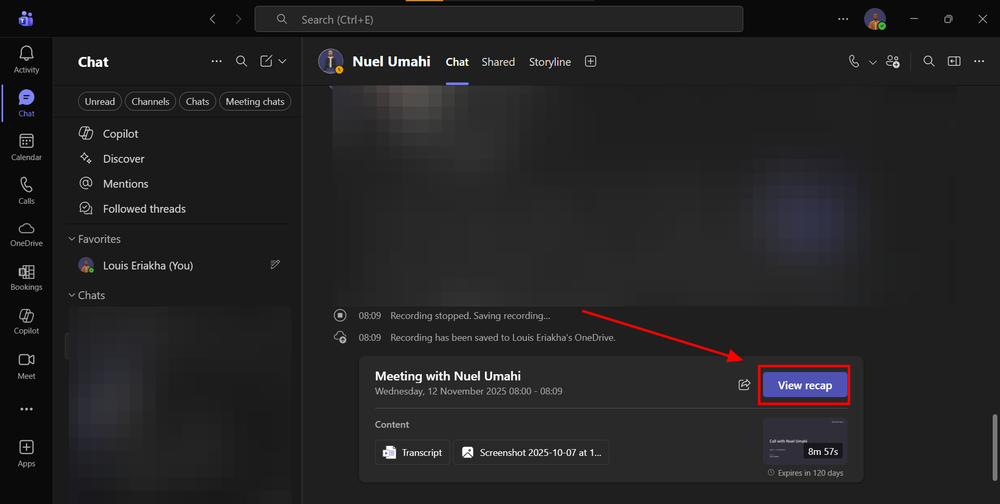
Auto Transcribe Meetings – Wait for the “View Recap” Button
After the meeting ends, go back to your Teams chat where the meeting summary appears.
Within a few minutes, you’ll see a View recap button.
This gives you access to:
-
Meeting summary
-
Transcript
-
Attendance report
-
Shared files
-
Recording (if you selected that option)
The transcript continues processing in the background for accuracy.
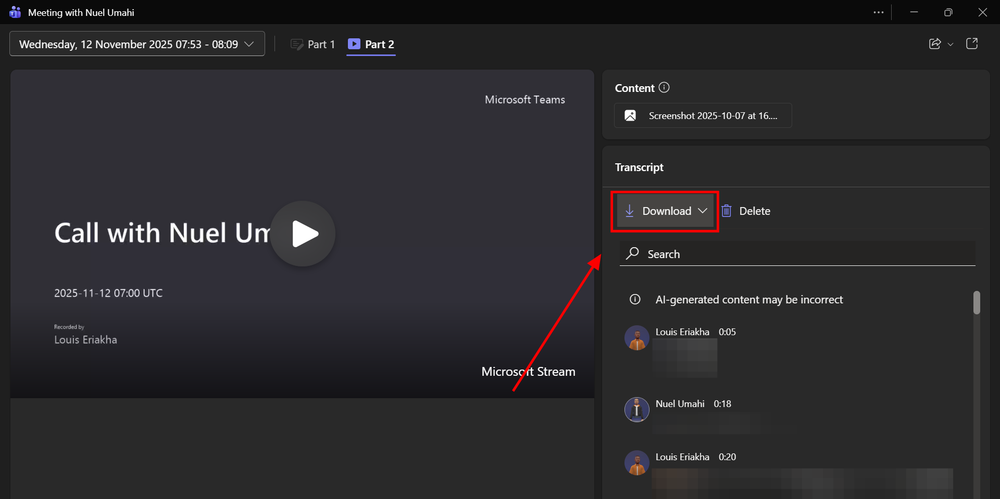
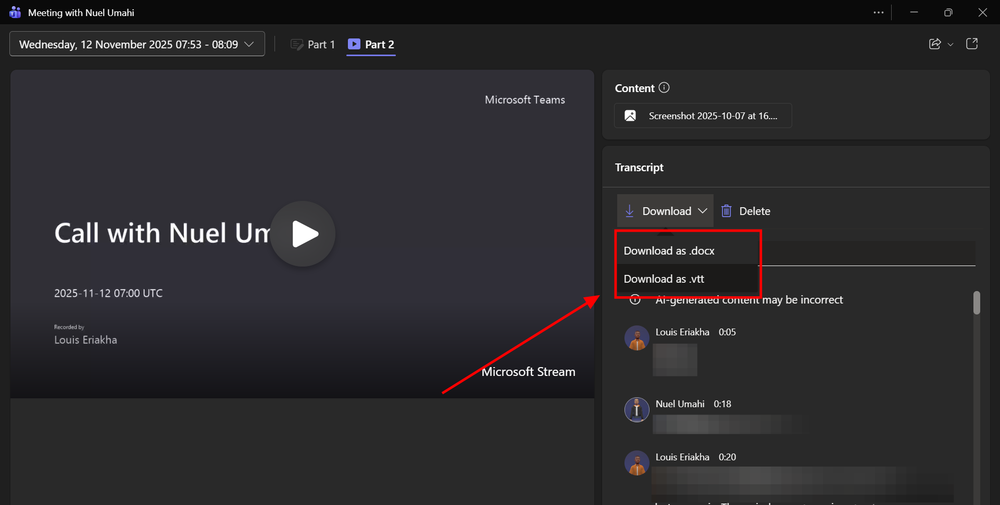
Auto Transcribe Meetings – Download Your Transcript
Now that the Auto Transcribe Meetings feature has generated your text file, you can save it locally.
Teams allows downloading in two formats:
-
.docx (Microsoft Word file)
-
.vtt (subtitles file format)
Choose the one that best fits your workflow. Most people prefer .docx for editing, sharing, and internal documentation.
If you run a digital workplace or manage a remote team, having downloadable transcripts is incredibly helpful for compliance, auditing, and future reference.
Using Transcribe Meetings to Improve Productivity
Once you begin using transcription consistently, you’ll notice:
-
Meetings become more efficient
-
Decision-making improves
-
It’s easier to recall and search previous discussions
-
You can quickly send meeting highlights to absent team members
Teams also integrates seamlessly with Microsoft 365 apps, allowing you to store transcripts in SharePoint, OneDrive, or your organization’s shared library.
Privacy and Ethical Use of Auto Transcribe Meetings
Since transcription records spoken content, always ensure:
-
All participants are informed
-
Sensitive information is protected
-
Company guidelines are followed
Microsoft Teams automatically displays notifications, but verbally informing attendees is a good professional practice.
Conclusion
The Auto Transcribe Meetings feature in Microsoft Teams removes the pressure of keeping up with fast discussions and ensures nothing important slips through the cracks. With a few simple steps, you get an accurate written record that boosts collaboration, saves time, and supports better decision-making.
Whether you’re working remotely, handling client meetings, leading team discussions, or managing project updates, Auto Transcribe Meetings gives you a reliable system for capturing every detail without distractions.