

Reset NVRAM on Mac to Fix Common Issues
If you’re dealing with strange glitches on your Mac, like messed-up sound, display errors, or a startup that feels confused, learning how to reset NVRAM on Mac could be the quickest fix you’ll ever try.
This small but powerful troubleshooting step can resolve common Mac issues instantly, helping your system perform like new again.
What is NVRAM on Mac?
Before diving into how to reset NVRAM on Mac, let’s understand what it actually does.
NVRAM (Non-Volatile Random Access Memory) is a small storage section inside your Mac that remembers specific settings even when your device is turned off. It stores key data like:
-
Startup disk preferences
-
Speaker volume levels
-
Display resolution
-
Time zone settings
-
Kernel panic information
In short, NVRAM acts as your Mac’s short-term memory for vital system configurations.

Why You Might Need to Reset NVRAM on Mac
Over time, this memory can become corrupted or confused, often after a major macOS update or hardware change. That’s when you’ll start to notice problems such as:
-
Wrong startup disk being selected
-
Audio not working properly
-
Display resolution resetting frequently
-
Slow or stuck startup
-
Peripherals (keyboard/mouse) misbehaving at boot
When these annoyances pile up, a simple NVRAM reset can often solve them all in one go.
Important Note Before You Reset
It’s completely safe to reset NVRAM on Mac, but remember: it restores system preferences to factory defaults. You might need to readjust settings like screen resolution, sound volume, or time zone afterward.
Note: You can only reset NVRAM on Intel-based Macs.
For Apple Silicon (M1, M2, or M3) Macs, shutting down and restarting automatically refreshes NVRAM, so no manual reset is needed.
How to Reset NVRAM on Mac (Step-by-Step Guide)
Follow these simple steps to perform an NVRAM reset safely:
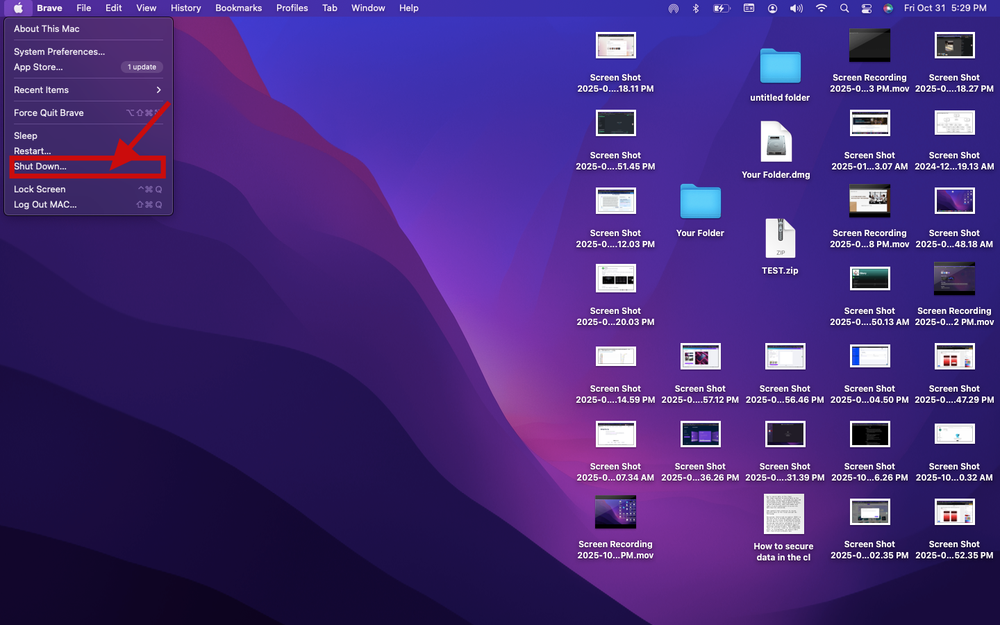
Step 1: Shut Down Your Mac
Go to the Apple menu → Shut Down and wait for your device to power off completely.
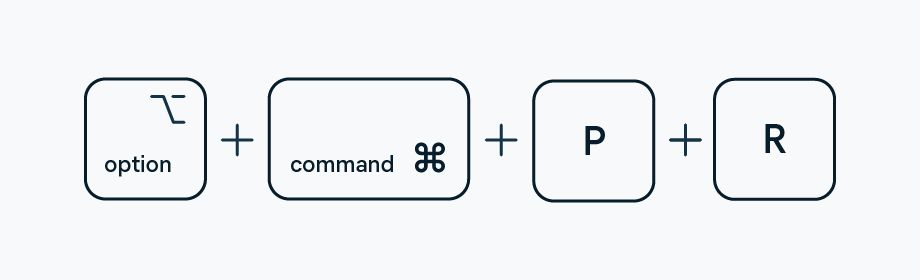
Step 2: Press Power + Shortcut Keys
Turn on your Mac and immediately press and hold Option (⌥) + Command (⌘) + P + R simultaneously.
Step 3: Keep Holding for 20 Seconds
-
On older Intel Macs, release the keys after you hear the startup chime twice.
-
On newer Intel Macs (T2 chip), hold for 20 seconds, the Apple logo will appear and disappear twice.
Step 4: Let Your Mac Boot Normally
Release the keys and allow your Mac to continue the startup process.
Step 5: Reconfigure Your Settings
After your Mac boots up, revisit System Settings → Startup Disk, Display, Sound, and Date & Time to confirm or adjust your preferences.
When Resetting NVRAM on Mac Works Best
Resetting NVRAM often works like a charm for issues related to:
-
Display glitches or flickering screens
-
No sound output or incorrect volume
-
Incorrect boot disk errors
-
Keyboard and mouse unresponsiveness
-
Unexpected freezes or crashes during startup
If your Mac still acts up afterward, try resetting SMC (System Management Controller) — another low-level system fix that complements NVRAM resets.
You can find Apple’s official guide on this here:
Apple Support: Reset NVRAM or PRAM on your Mac
Does Resetting NVRAM Delete Data?
No, resetting NVRAM does not erase files, apps, or user data. It only clears minor configuration memory that controls startup and hardware behavior. Think of it as giving your Mac a fresh start without losing anything important.
Reset NVRAM on Mac: The Hidden Fix for Everyday Glitches
You might be surprised how many frustrating problems disappear after this small tweak. From boot delays to audio bugs, resetting NVRAM is one of the most effective (and underrated) Mac maintenance tips.
At TechExper, we’ve seen users resolve dozens of recurring macOS issues in just minutes, no software reinstallations or service appointments needed.
If you’ve never tried it, now’s the perfect time to give your Mac a quick refresh.