

If your sound system has suddenly gone silent or started making strange noises, it’s time to repair and troubleshoot speaker problems before spending money on a replacement. A faulty wire, damaged cone, or blown voice coil could be behind the issue, but most of these can be fixed with simple DIY techniques.
In this detailed guide, you’ll learn how to diagnose and repair and troubleshoot speaker issues efficiently. Whether your speakers are passive or active, you’ll find step-by-step instructions that help you bring them back to life with clear, distortion-free sound.

Step 1: Check for Basic Connection Problems
Before assuming your speaker is dead, start with the basics. Many “broken” speakers are simply victims of a loose connection or unplugged cable.
-
Ensure that both the left and right wires are properly connected.
-
If only one side works, swap the left and right cables to confirm whether the issue is with the wire or the speaker itself.
-
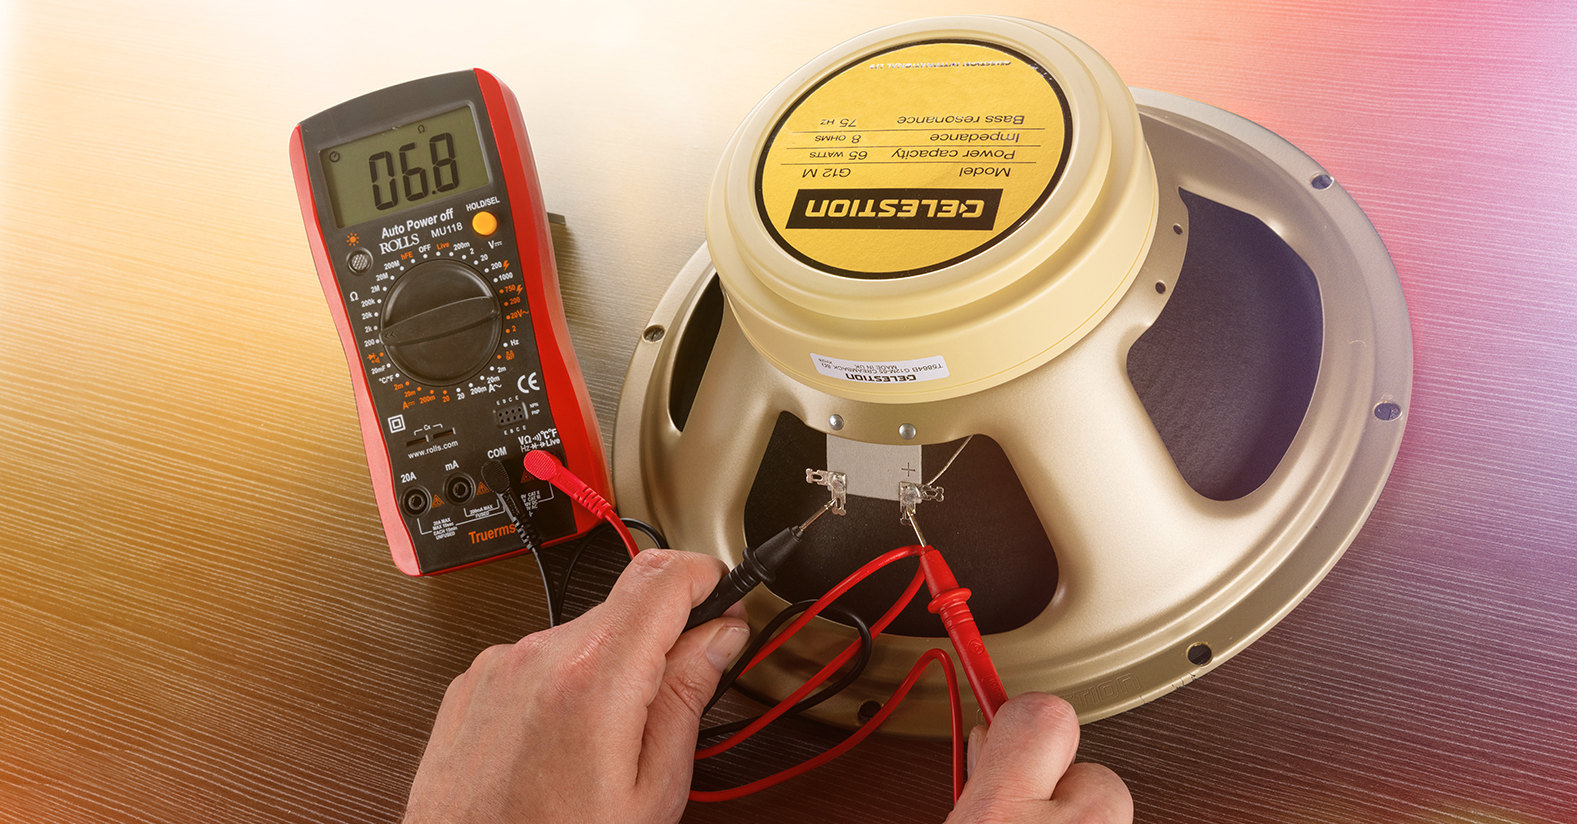
Use a multimeter to measure resistance between the positive and negative leads. A healthy speaker usually shows resistance between 1 and 16 ohms.
-
If you get 0 or infinity, it’s a strong sign that the speaker is blown or the circuit is broken.
Step 2: Identify Active or Passive Speaker Type
Knowing the type of speaker you’re dealing with is essential when trying to repair and troubleshoot speaker performance issues.
-
Active Speakers (Powered): These have built-in amplifiers. Check if the power cable is connected properly and the unit is switched on.
-
Passive Speakers: These depend on an external amplifier. Make sure the amplifier is powered and transmitting a signal.
If the amplifier is working but the soundbar or speaker isn’t, the speaker component itself likely needs repair or replacement.
Step 3: Fixing Speakers That Make Strange Noises
If your speaker produces crackling or muffled sounds, the internal parts might be damaged or loose.
-
Remove the speaker grill carefully to expose the cone.
-
Inspect for tears, cracks, or debris on the cone or dust cap.
-
Without power, gently press the speaker cone inward — if you hear crunching or scraping, the coil may be misaligned.
-
Minor tears in the cone can sometimes be sealed using epoxy or super glue, but if the damage is extensive, replacement is the better option.
Step 4: Replace the Speaker Driver or Tweeter
One of the fastest ways to repair and troubleshoot speaker performance is by replacing the damaged driver or tweeter.
-
Search online for your speaker model name followed by “replacement woofer” or “replacement tweeter.”
-
Many manufacturers offer official replacement parts that ensure proper fit and sound quality.
-
Replacing these components is generally easier and faster than attempting a full recone or coil replacement.
Step 5: Reconing a Speaker Like a Pro
For professionals or audio enthusiasts, reconing a speaker is a valuable skill. It involves replacing the speaker cone, voice coil, and outer surround to restore full functionality.
The voice coil is the small cylindrical part that moves inside the magnet structure at the rear. Over time, it can burn or deform from excessive heat. The reconing process brings everything back to new condition.
Step 6: Step-by-Step Guide to Reconing a Speaker
1. Cleaning the Speaker Frame
Begin by removing all traces of the old cone, surround, and coil. Use a razor or scraper to peel off residue. Underneath, you’ll find a wavy support structure called the spider, which helps center the cone. Remove it carefully.
Clean out every piece of debris or burnt material inside the magnet gap. Use compressed air or sticky tape to remove small metal particles.
2. Preparing the Surface
Mask the voice coil gap to prevent dirt from entering. Clean the outer metal surface thoroughly using a grinder or sandpaper to ensure a strong adhesive bond later.
3. Gluing and Assembly
Fit the new voice coil, cone, dust cap, and spider into position. Apply high-quality speaker adhesive or epoxy and secure the components to the frame. Reconnect the terminals to the positive and negative leads. Always follow the manufacturer’s guide for best results.
4. Let It Dry and Test
Allow the adhesive to dry for at least 12 hours. Once dry, gently push the cone inward — it should move smoothly without scraping. If it rubs or sticks, foreign debris may be stuck inside the magnet gap, requiring re-cleaning.
Step 7: Understanding Speaker Lifespan and Maintenance
Even after you repair and troubleshoot speaker components, remember that no speaker lasts forever. Over time, heat, vibration, and environmental exposure wear them down.
Common aging issues include:
-
Rubber surrounds drying and cracking.
-
Voice coils detaching due to heat.
-
Cones losing elasticity and response speed.
To extend the life of your speakers:
-
Avoid overdriving your amplifier.
-
Keep volume levels moderate.
-
Use a limiter to prevent distortion from high voltage.
Some vintage speakers last 20–30 years, but consistent care ensures lasting clarity and performance.
For further learning, check SoundGuys Speaker Care Guide.